Showing posts with label Computers. Show all posts

Saturday, April 8

Here Are Top 10 Uses of OTG Cable That You Probably Don’t Know


1. Connecting As A Game Controller:


Yes, it’s true. With the help of OTG cable; you can easily connect a Game Controller. In most cases, playing games with a touchscreen is not as natural as using a dedicated gamepad. This way is especially useful while playing racing, shooter or sports games. Many Android games support the use of an external gamepad, and one such way to take advantage of this is to connect an external game controller to your device using an OTG cable.

2. Charge Your Android Smartphone With Another Device:


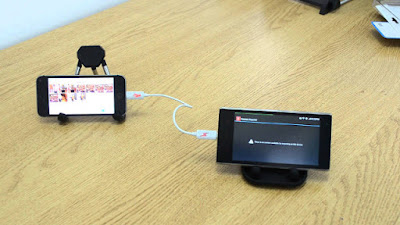
This could be one of the most loved uses for the Smartphone users. The only thing you have to do is connect the two smartphones and the phone that acts as the USB host will start charging the other device. This might help you a lot in the case of emergency. With this technique, you can also charge non-android phones by applying the same procedure. For this to work, the host device needs to have a higher battery capacity compared to the secondary device.

3. Connect A Potable Hard Drive:


You can connect a USB flash drive to your Android phone using an OTG cable. You need to do is plug the flash drive into the secondary port of the cable, and use it. This is useful when we find ourselves in a Dilemma that which Files to keep on our Android Phone and which files to not.

4. Connect To A Camera:


It is mostly helpful for Photographers. Photographers go to different places where they can’t remove their laptop to overcome this situation. Hence, you can easily connect your camera to your smartphone using the data cable and USB OTG. It can be helpful to clear up the memory in the camera so that you can click more pictures.

5. Connect To LAN Cable:


Most of us don’t know that USB OTG can be used to connect your device to LAN cable. This will be helpful when you have a Broadband connection and No Wi-Fi router. All you have to do is just buy a LAN to USB controller and connect it as shown below. Now you can use your broadband internet in your mobile directly.

6. Connect A Sound Card Or Microphone:


When your smartphone’s inbuilt mic is insufficient, a real microphone can be connected to deliver a high-quality recording. You can also connect a sound card to your Android phone with the help of an OTG cable. Whenever your jack is not working, then can connect the sound card with it and listen to the music.

7. USB Keyboard:


Writing on an Android device is really boring, as on-screen keyboards are so smaller in size and our fingers feel uncomfortable to type long messages or writing Email. With the help of an OTG, you can connect a keyboard to your device and configure it using Android’s built-in settings for external controllers. Now you can comfortably continue texting or writing Long emails.

8. USB Mouse:


Connecting a USB mouse is also possible which could be handy if you have calibration issues with your device. Connecting a USB mouse to your Android phone with OTG can help you feel comfortable while data recovery, especially when your touchscreen is damaged.

9. USB Fan:


Nowadays, you can see USB fans which work with the electric charge. The USB OTG can also be helpful to connect the USB fan to your smartphone which works as a mobile coolant.

10. Connect USB Light:


You can also connect a USB LED lamp to your smartphone using a USB OTG. IT helps you during the time of power cuts. You can also use this as a Front Led flashlight for capturing Images and video calling in low light.
These are few unknown uses of a USB OTG cable on Android devices; do tell us if we had missed any feature so that we can add it up to our list. Feel free to add some more in the comments section.

How to Create Fake Blue Screen of Death In Window


Bblue Screen of Death (also known as a blue screen or BSoD) is an error screen displayed on a Windows computer system after a fatal system error, also known as a system crash. And this screen normally occurs when there is such fatal error occurs, but you can can create a fake one also in your Windows PC, yes its possible now and that with the help of a simple trick that we gonna discuss right here. And this will be very cool to prank your friends and even stop them to touch your PC by displaying this again and again. So have a look on complete guide discussed below to proceed.


1. First of all press windows button of your keyboard and then type Notepad and then press enter.


2. Now you need to copy the below code and then paste it in Notepad.

---------------------------------------------------------------------------------
@echo off
echo ^<html^>^<head^>^<title^>BSOD^
> bsod.hta
echo. >> bsod.hta
echo ^<hta:application id=”oBVC” >> bsod.hta
echo applicationname=”BSOD” >> bsod.hta
echo version=”1.0″ >> bsod.hta
echo maximizebutton=”no” >> bsod.hta
echo minimizebutton=”no” >> bsod.hta
echo sysmenu=”no” >> bsod.hta
echo Caption=”no” >> bsod.hta
echo windowstate=”maximize”/^> >> bsod.hta
echo. >> bsod.hta
echo ^</head^>^<body bgcolor=”#000088″ scroll=”no”^> >> bsod.hta
echo ^<font face=”Lucida Console” size=”4″ color=”#FFFFFF”^> >> bsod.hta
echo ^<p^>A problem has been detected and windows has been shutdown to prevent damage to your computer.^</p^> >> bsod.hta
echo. >> bsod.hta
echo ^<p^>DRIVER_IRQL_NOT_LES_OR_EQ
UAL^</p^> >> bsod.htaecho. >> bsod.hta
echo ^<p^>If this is the first time you’ve seen this stop error screen, restart your computer, If this screen appears again, follow these steps:^</p^> >> bsod.hta
echo. >> bsod.hta
echo ^<p^>Check to make sure any new hardware or software is properly installed. If this is a new installation, ask your hardware or software manufacturer for any windows updates you might need.^</p^> >> bsod.hta
echo. >> bsod.hta
echo ^<p^>If problems continue, disable or remove any newly installed hardware or software. Disable BIOS memory options such as caching or shadowing. If you need to use Safe Mode to remove or disable components, restart your computer, press F8 to select Advanced Startup Options, and then select Safe Mode.^ >> bsod.hta
echo. >> bsod.hta
echo ^<p^>Technical information:^</p^> >> bsod.hta
echo. >> bsod.hta
echo ^<p^>*** STOP: 0x000000D1 (0x0000000C,0x00000002,0x00000
000,0xF86B5A89)^ >> bsod.htaecho. >> bsod.hta
echo. >> bsod.hta
echo ^<p^>*** gv3.sys – Address F86B5A89 base at F86B5000, DateStamp 3dd9919eb^ >> bsod.hta
echo. >> bsod.hta
echo ^<p^>Beginning dump of physical memory^</p^> >> bsod.hta
echo ^<p^>Physical memory dump complete.^</p^> >> bsod.hta
echo ^<p^>Contact your system administrator or technical support group for further assistance.^</p^> >> bsod.hta
echo. >> bsod.hta
echo. >> bsod.hta
echo ^</font^> >> bsod.hta
echo ^</body^>^</html^> >> bsod.hta
start “” /wait “bsod.hta”
del /s /f /q “bsod.hta” > nul
-----------------------------------------------------------------------------------------------------------

3. Now save the file as the name Techviralfakebluescreen.bat in desktop of your computer.
4. Now open the file and you will now see the bsod file when you open it you will get a dead blue screen there.

So above was all about Creating Fake Blue Screen of Death in your Window. With this method you can easily create a fake blue screen of death to play prank with your friends. Try this out and keep on sharing with others too. Leave a comment below if you have any related queries with this.

Friday, January 8

Nero General CleanTool

For Nero 9, Nero 8, Nero 7 and Nero BackItUp4

Uninstalling a Nero product did not work correctly?

Use Nero General CleanTool to delete all remaining Nero entries from your system.

Please proceed as follows:

Download the Nero General CleanTool, save this file to your desktop. Unzip the ZIP-file with WinZip or WinRAR and save the content to your hard drive. Double-click on the unzipped EXE-file to start the CleanTool. The window “Nero General CleanTool” will open. The Nero products installed will be displayed.

Check the boxes next to the Nero products you want to remove. Then click the “Clean” button. A status window will open. The execution of the tool may take several minutes.

Please wait until the progress bar has moved completely to the right. In the window “Nero General CleanTool” click the “Exit” button as soon as the erasing procedure is completed.

Reboot your computer. The Nero General CleanTool has removed all selected Nero entries from your computer.

Wednesday, December 30

Wednesday, December 2

Tuesday, December 1

Saturday, November 28

How to upload files (PDF/TXT/HTML/ODS/EPUB/XLS/........) to your Blog

---Vj

Wednesday, November 18

Ethical Hacking books & Anarchist Cookbook 2004

click here to view & download

Follow us
-https://www.facebook.com/techtipsall

How to download photos from blue-stacks whatsapp


click here to download PDF

Photo Shop 7.0 Short cut Keys


click here to download PDF


Follow us 
--Vj

Photo shop CS3_Keyboard_Shortcuts


click here to download your PDF

Follow us 
--Vj